


Listen to this post: How to Make a DIY Advent Calendar – Complete Guide 2025
How to Create a Personalized DIY Advent Calendar for December 2025: Step-by-Step Guide
Looking to add a magical and heartfelt touch to the 2025 holiday season? Instead of buying a generic advent calendar, why not build your own? A DIY advent calendar lets you craft a truly customized experience filled with hand-picked surprises your loved ones will cherish. Whether you’re a seasoned crafter or a complete beginner, this guide walks you through each step of creating a beautiful and practical countdown to Christmas.
What You’ll Need
- 24 small boxes, envelopes, or pouches
- Decorative supplies (wrapping paper, stickers, ribbon, markers)
- Numeral labels (1–24)
- Small gifts, candies, or notes
- Cardboard, cork board, or wooden board (for mounting)
- Glue gun, scissors, double-sided tape
- Ruler and pencil for layout planning
- Optional: clothespins, twine, push pins
- Time estimate: 2–4 hours
- Skill level: Beginner to Intermediate
Before You Begin
Before crafting your DIY advent calendar, decide on a theme (e.g., rustic, modern, minimalist) and choose a display location. Make sure all items are age-appropriate and safe—especially if this is for children. Gather all materials beforehand to maintain momentum while crafting. Consider your budget and avoid perishable fillers like chocolates if the calendar will sit out in warm spaces.
Step-by-Step Instructions
Step 1: Choose a Format for Your Calendar
First, decide if you want a hanging calendar, a table-top display, or a wall-mounted design. Choose a base like a cork board, canvas, or even a wooden pallet. If you want something mobile, you can opt for a free-standing board that can be moved around your home. Make sure the format suits the space you plan to display it in and aligns with your aesthetic goals.
Why this matters: Choosing the right format ensures the calendar is both functional and visually fitting for your home environment.
💡 Pro Tip: Choose a reusable base so you can refresh and personalize it each year without starting from scratch.
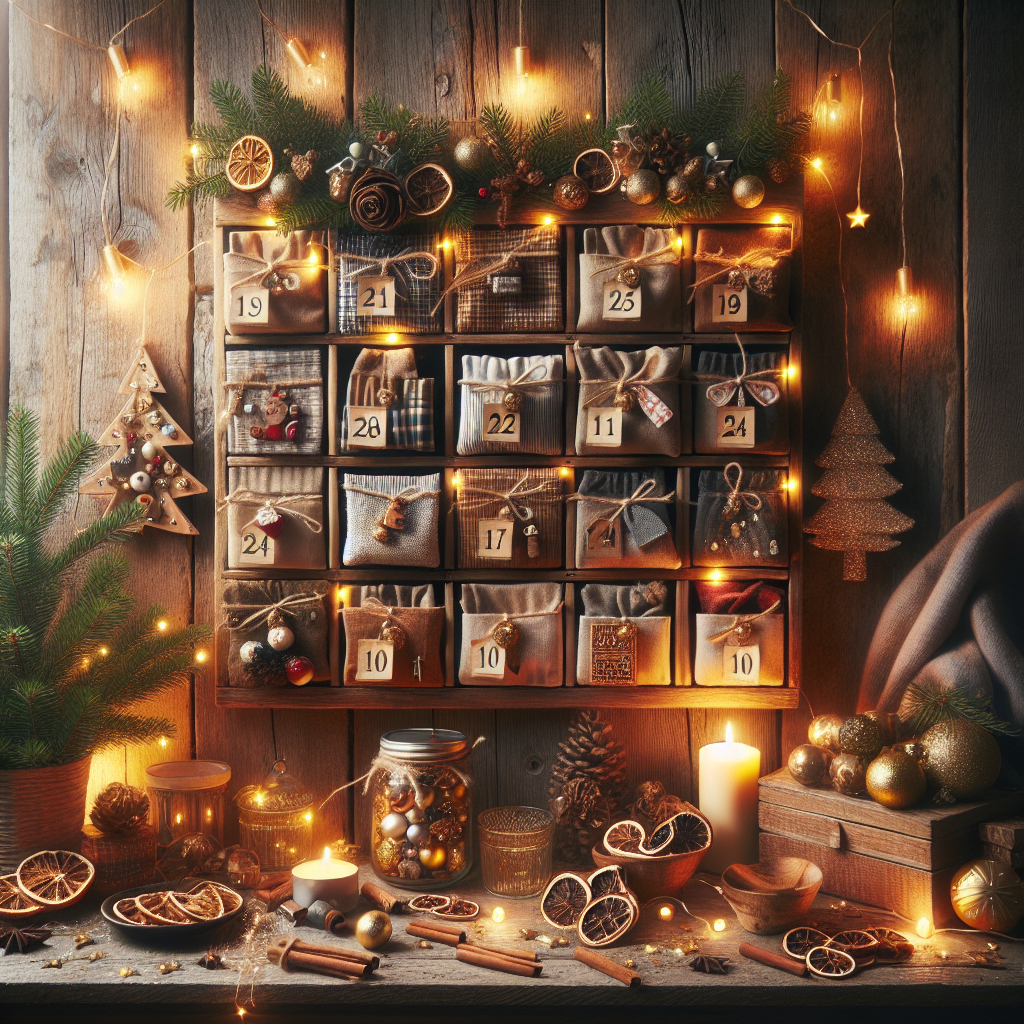
Step 2: Gather and Decorate the Containers
Use mini envelopes, boxes, paper bags, or fabric pouches for each day of December. Decorate them to match your theme using craft supplies like washi tape, glitter, or acrylic paint. Be sure to number them clearly from 1 to 24. If you’re aiming for a uniform look, use stencils or printed number tags to maintain consistency.
Why this matters: Customized containers make your advent calendar visually engaging and heighten the excitement of the countdown.
💡 Pro Tip: Use holiday-themed scrapbook paper to wrap plain boxes for a quick, seasonal makeover.
Step 3: Plan and Prepare the Contents
Choose what will go inside each container. Ideas include handwritten notes (jokes, riddles, or affirmations), small toys, festive candy, or mini DIY kits. For family calendars, you can include shared activity ideas like “bake cookies tonight” or “watch a holiday movie.” Layout the items beforehand to balance contents between days.
Why this matters: Thoughtfully selected surprises make the advent experience more meaningful and memorable.
💡 Pro Tip: Use a spreadsheet to keep track of what goes in each day to avoid repetition or last-minute scrambling.
Step 4: Assemble the Calendar Layout
Arrange your containers on the board or mounting base. Start by placing larger or heavier items at the bottom for balance. Space the numbers evenly to create visual symmetry. You can use clothespins on twine for a hanging effect or fix them directly with tape, glue, or pins. Don’t permanently attach anything until you’re happy with the final layout.
Why this matters: A well-planned layout improves both the aesthetic appeal and ease of daily access.
💡 Pro Tip: Temporarily lay out items with sticky tack to test spacing before committing with glue or pins.
Step 5: Finalize and Add Special Touches
Once everything is positioned properly, secure each piece firmly. Add final decorative elements like LED lights, fake snow, or miniature garlands. Include a holiday greeting message or the calendar’s theme at the top for a finishing touch. If gifting, wrap your entire advent display or add the recipient’s name for personalization.
Why this matters: The added touches elevate your calendar from simple to show-stopping while preserving personal meaning.
💡 Pro Tip: Add QR codes linking to favorite holiday playlists, recipes, or family videos for an interactive layer.